Postage stamp quilt
Planning blocks and Color theory 101
I always start a new quilt with constructing one block from start to finish. This way I can test my seam allowances and sewing system, to make any needed changes before I have gotten bogged down. The picture tutorial follows. Some of the steps are shown with different blocks. I had to go back and take new pictures where needed lol.
-
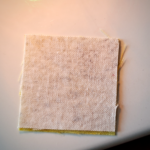
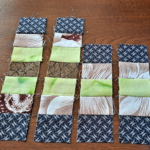
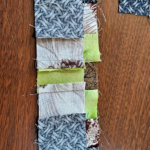
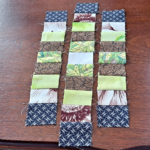
- Each stack contains all the pieces to complete a block: 1, 4, 8, 12, 16, and 20 pieces.
-
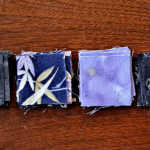
- Unpacking a stack: from the right, 1, 4, 8, 12, 16, and 20 pieces.
-

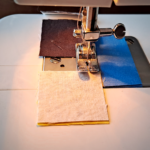
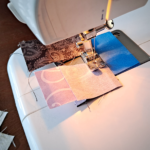
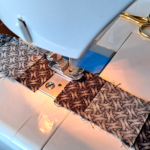
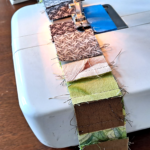
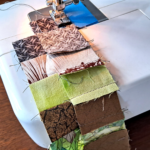
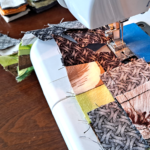
- Chain stitching pieces together to save time and thread.
-
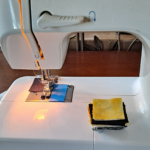
- A complete stack on the machine, waiting to be pieced.
-
- Take the 1 piece, and one of the 4 pieces, to start sewing together the central row.
-
- With right sides together, align the raw edges …
-
- … and add it to the chain, stitching the raw edge together. Most quilt piecing uses a 1/4″ seam (the blue tape on the sewing machine is exactly 1/4″ from the needle, making for a 1/4″ seam sewing guide).
-
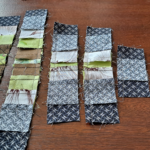
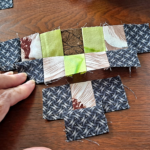
- The chain stitched centers (the 1 piece, stitched to one of the 4 pieces) of six blocks.
-
- Open the center, and place the next 4 piece, right sides together, raw edges aligned.
-
- Begin chain stitching the rows.
-
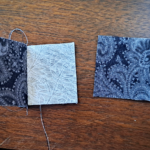
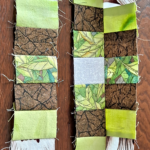
- Competed rows. Notice that the central row has the 1 piece for the center square; then the two rows next to it has the 4 piece for the center square, and on down the line.
-
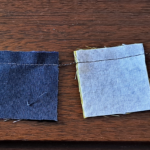
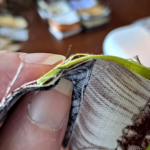
- Pressing seam allowances in rows: Important to alternate the direction. In this block, the central row seams were pressed in to the center, while the next rows were pressed out.
-
- The reason for pressing seams in alternate directions. When aligning the squares to sew one row to the next, the seams but up against each other, to allow for (nearly) perfectly matched corners.
-
- See? Nearly perfectly matched corners.
-
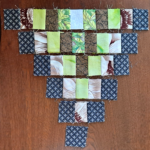
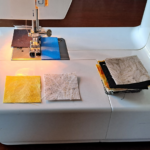
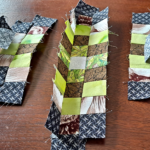
- Constructing a block from the sewn rows.
-

- The 2 end rows and the 2 single squares.
-
- Place the single square, in the center of the end row, right sides together, aligning the raw edges, and chain stitch.
-
- Then do the same for the next two rows.
-
- Aligning rows.
-
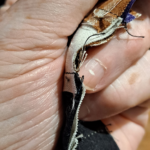
- Checking that the seams are butted up against each other (yes, I need a manicure, sorry).
-
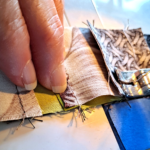
- Sometimes the individual squares don’t line up neatly due to human error in cutting or sewing pieces. You still make sure the seams are butted up against each other …
-
- … because the machine’s feed dogs will even out the difference (as long as it’s slight) when it is sewn.
-
- The remaining central rows.
-
- Aligning and sewing.
-
- The first sets of rows done.
-
- Open the sewn central rows and align the remaining row …
-
- … and sew, right sides together, and seams butted up.
-
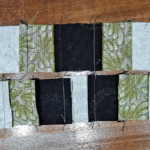
- Now open up the two sets of end rows …
-
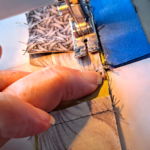
- … right sides together, aligning raw edges, butting up seams, and sew.
-
- I have a central section, and two end sections. Two more seams to go until the block is finished.
-
- One more seam to go …
-
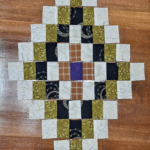
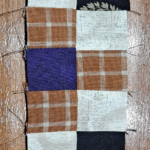
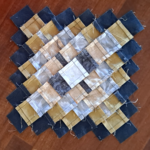
- The finished block.
-
- Pressing the seams of a finished block.
Continued:
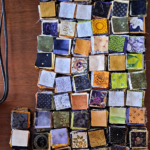
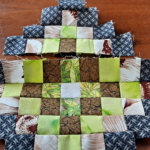
Finished blocks to date (Jan 12, 2023)
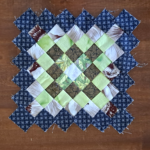
Breaking the color rules
More finished blocks (Jan 18, 2023)
Even more finished blocks (Jan 25, 2023)
The last blocks completed (Jan 31, 2023)
Planning the quilt top (Feb 05, 2023)
Quilt block arrangement record (Feb 06, 2023)
Bordering the quilt blocks (Feb 08, 2023)
What happened to the Postage Stamp Quilt? (Apr 24, 2023)


Leave a Reply